

How To Draw In Krita With Mouse
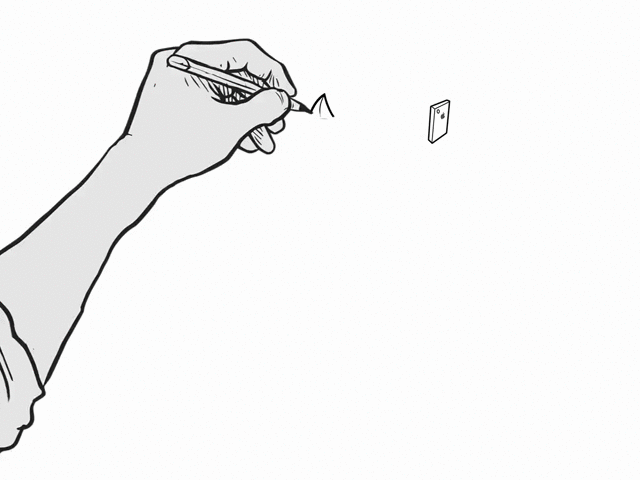
Illustration without using a pen tablet ?
Illustrations in Kri ta using the mouse is pretty much every beginners dilemma, as most don't take access to pen tablets. To overcome this problem, we will now learn how to ink and color our sketches using just the mouse.
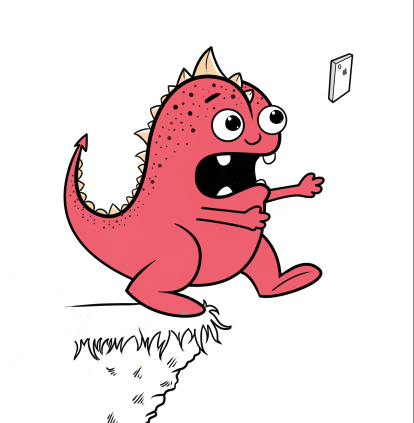
Note : Yous can use your own scanned drawing or follow forth the with sketch I accept already created.
Requirements :
Time : three hours including sketching time.
Art : Scanned illustration to exist inked.
Skill level: Beginner.
Line weight is key to creating illustrations having a depth to them. Therefore, when using a mouse we will take to manually create this upshot of a tapering stroke.Nosotros volition acquire this offset before working on our scanned cartoon.
- Open a New file in Kri ta .
- Select the 'Brush' tool (choose the inking brushes).
- Set up the Brush size to 12 px.
- Prepare the color to black.
- Select the ' Bezier' Curve tool form the toolbar.
- With the tool selected draw a uncomplicated line and hit 'Enter'.
Annotation : This will create a stroke using settings defined for brush tool previously(12px, blackness).
- At present select the ' Bezier ' Curve Selection Tool.
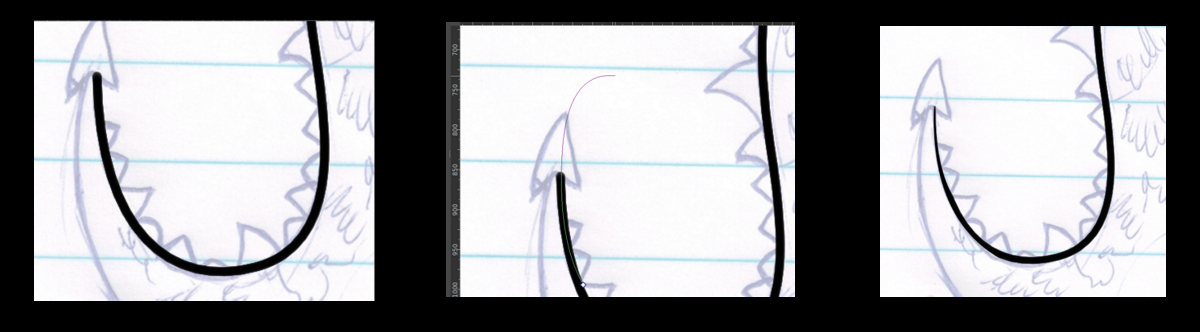
- Select the ends of the stroke and delete the portions the stroke in the way shown in the video beneath.

The curve will expect like paradigm below :
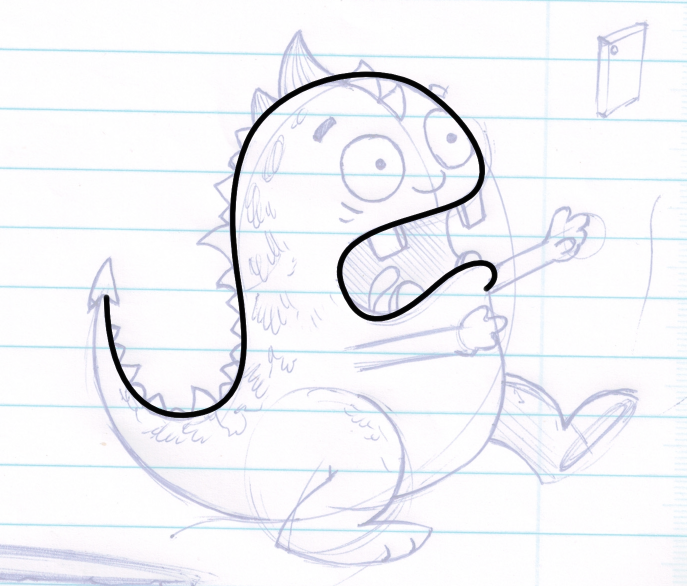
This is the exact way nosotros will be creating lines over our scanned sketch.
- Now open a new certificate in Kri ta.
- Import the scanned sketch.
- Ready its opacity to 33%.
- Create a new layer to a higher place the sketch layer and name it 'Ink'.

- At present follow the curves along the lines of the sketch and hit 'Enter'.
- The line stroke will be created as per the width of the brush yous accept set up. So don't forget to check your brush likewise color and size before using the Bezier Curve.
- Now taper the ends of the stroke by selecting the ends with Bezier curve selection also.
- Delete them merely like previously discussed.
- Continue the same manner for the rest of the illustration.
Note : There may areas where y'all tin let the lines to overlap, you lot tin can delete unwanted portions afterward.


No other actions are necessary right at present, only follow along the process until you lot complete the illustration.
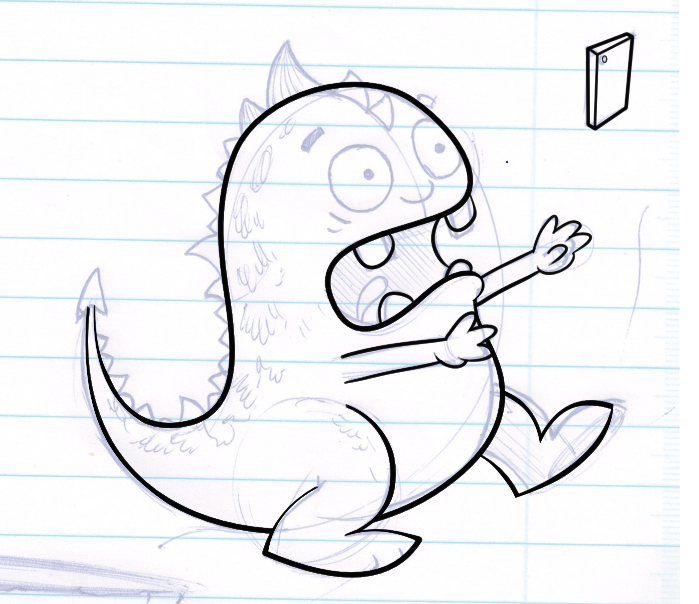
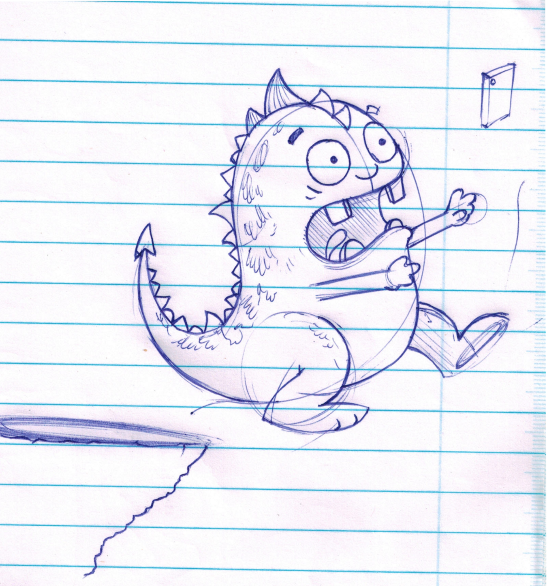
Once yous have completed the base outline, you can move in on completing the spikes on the dorsum and the eyes.
- I reduced the castor size here from 12px to 8px, this helps create more than variation.
Having lines of uniform width all over volition make the illustration expect flat.
I used the circumvolve tool to create the eyes, and the Bezier bend once again to create the spikes.
The spike lines are quite short, to salve time yous tin endeavour and manually create them the using mouse freehand.
Coloring
Compared to the whole line fine art, this segment will be much easier and shorter. So let'southward brainstorm.
- Lock the analogy layer by clicking on the lock icon in the layers panel.
Note : Its frustrating when you inadvertently get about coloring the drawing before you realize y'all're painting on the same layer. And so to avoid it its best to lock this layer down.
- Under the inked layer create a new one and phone call it 'Base color'.
- Then select the brush tool and with the mouse just fill in the colors.
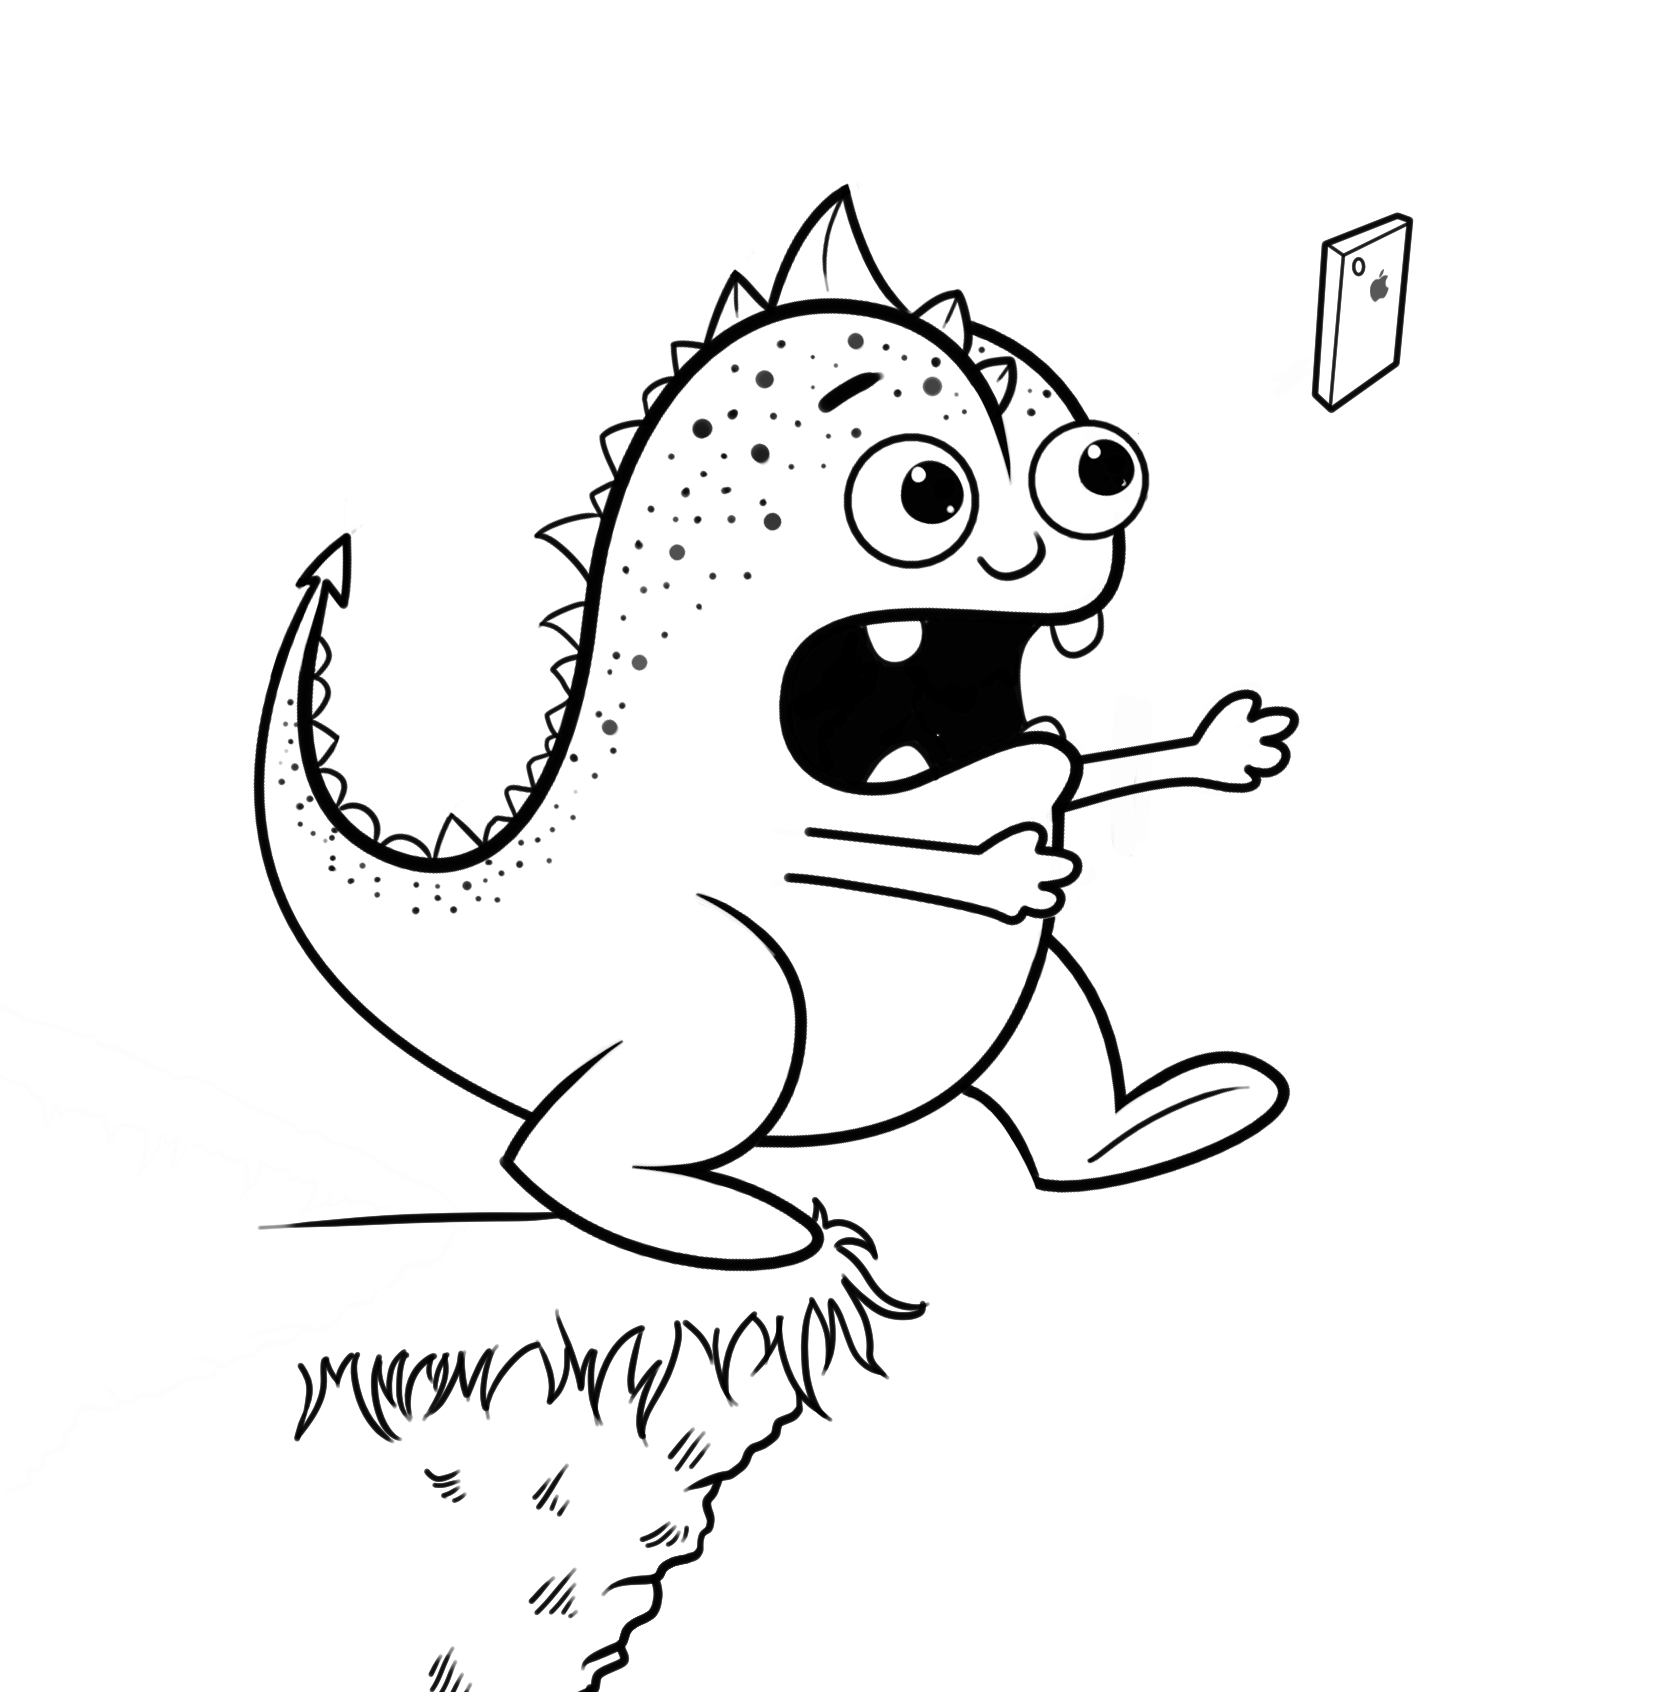
The light in this composition will enter from the meridian correct corner.
So we volition add highlights to the character based on that.
- Create a layer and name information technology 'Highlights'.
- And so create a layer called 'Dark' in a higher place the base color layer.
Note : The shadows of the composition will exist created on this layer.
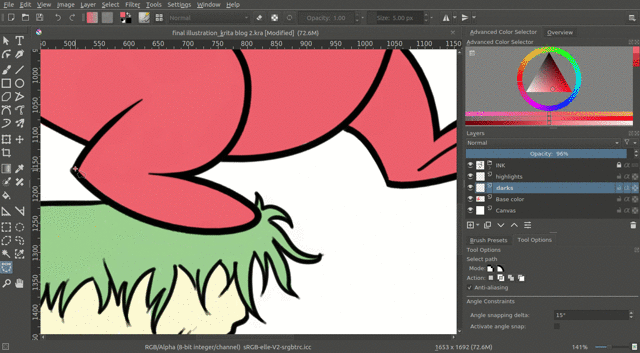
Equally shown in the above visual,
- I have used the Bezier bend selection tool to select dark areas,
- And then used the fill tool to fill in the color.
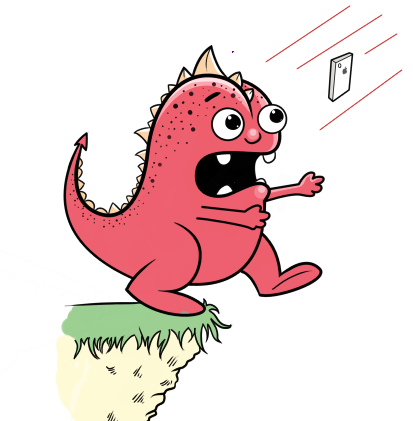
- Lastly, I added a background layer beneath the base of operations color.
- Then colored a portion of the sky to make the drawing stand up out better.
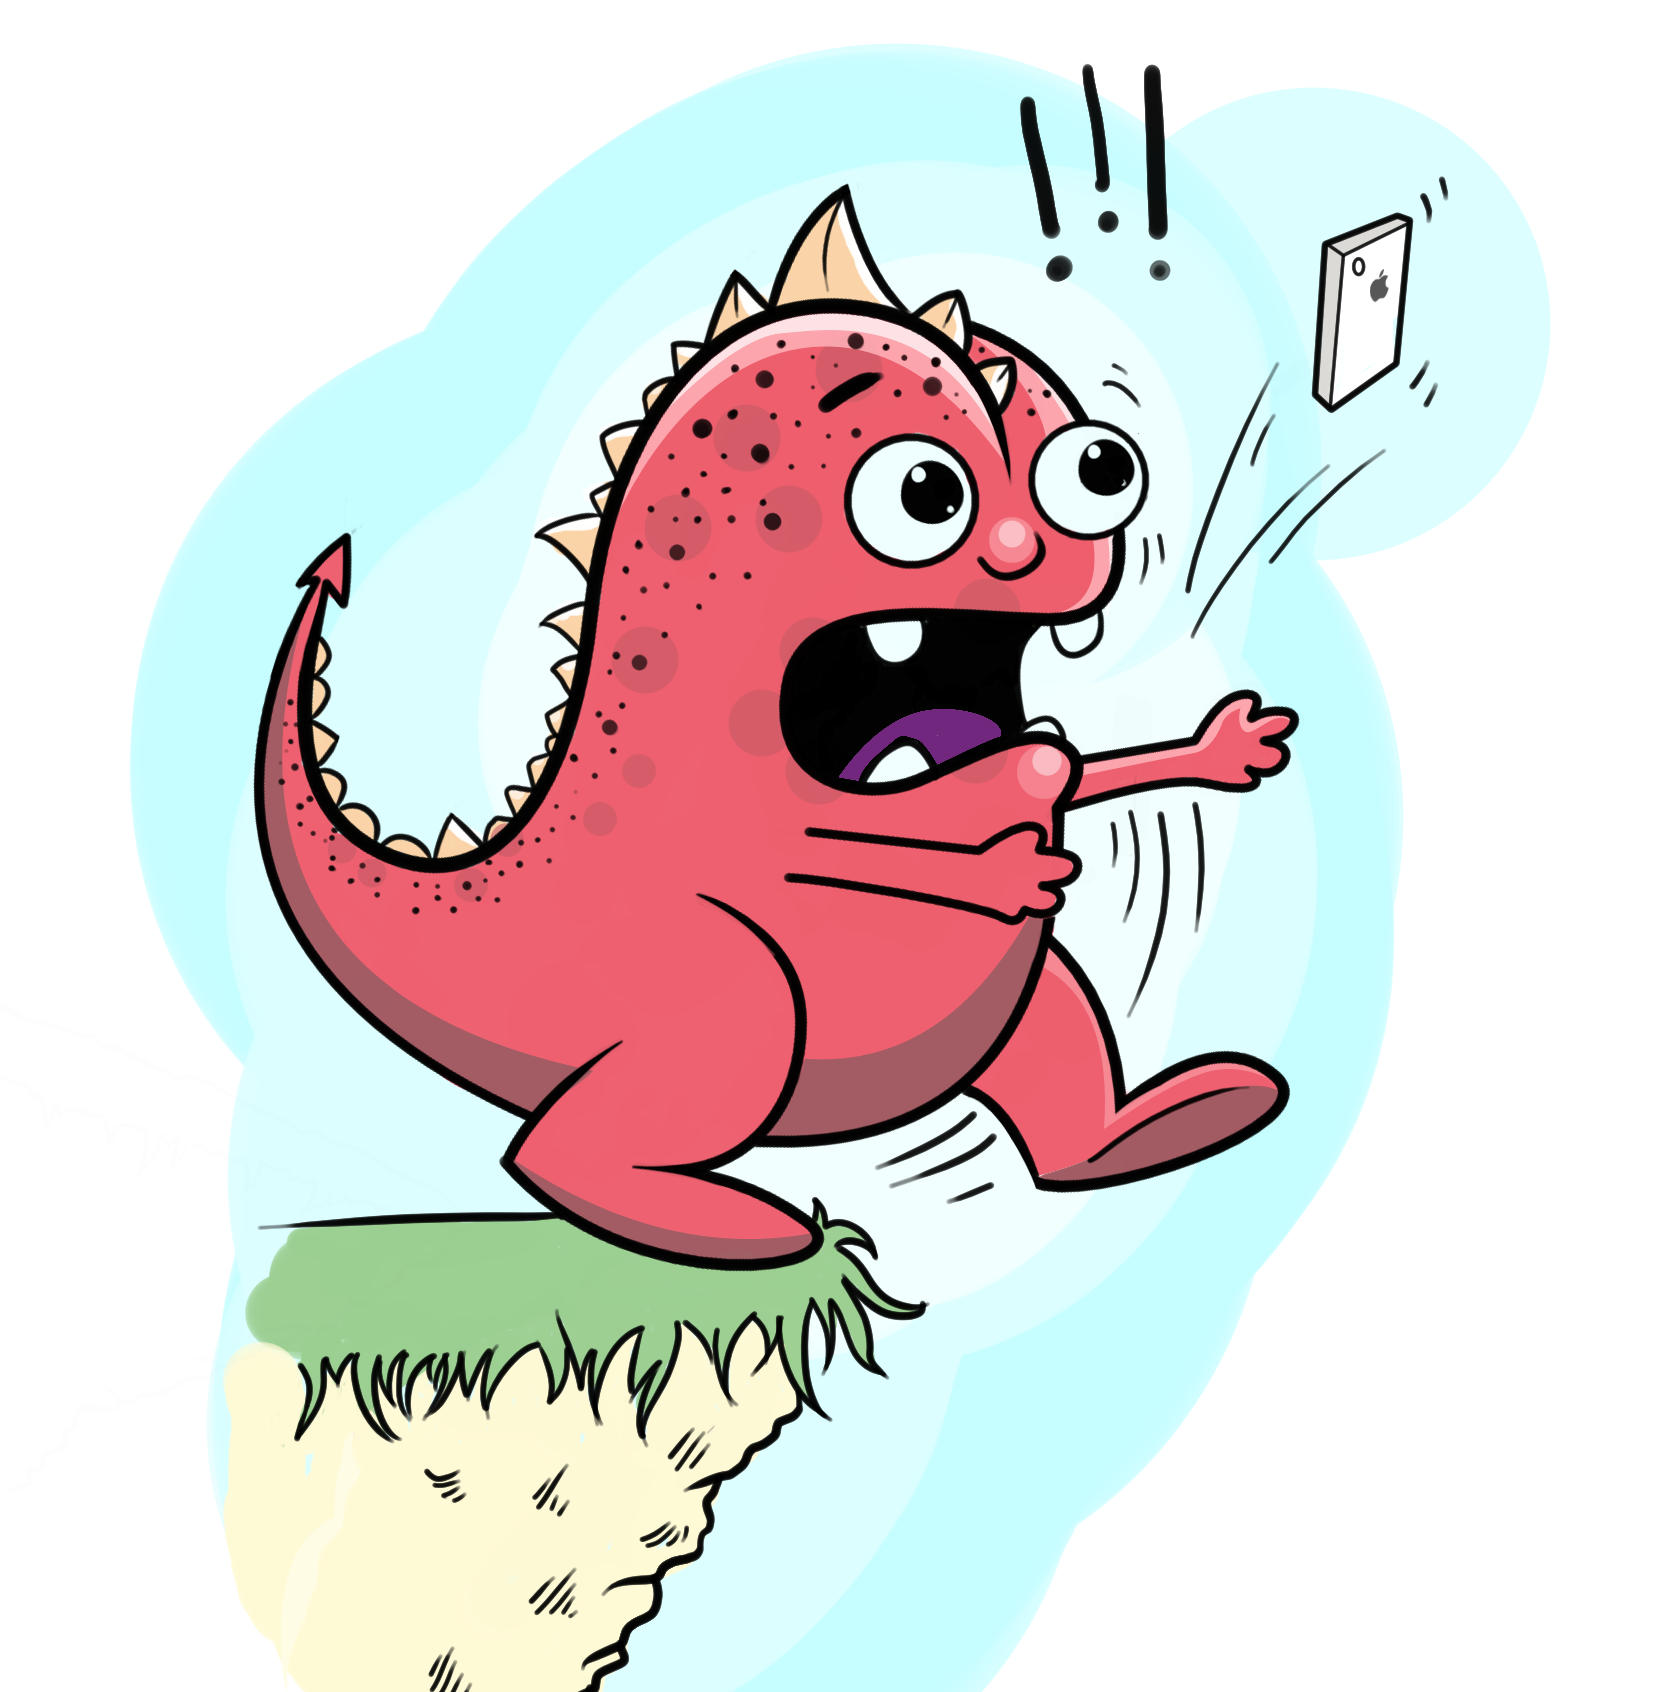
I decided to add few more details such equally the tongue and the speed lines to propose movement. The paradigm below is our terminal issue.
Desire to analyze your website? For more information read
Sharing your wordpress activities has never been so piece of cake, bank check out our article WordPress – Sharing your activities on Social Media.

Source: https://blog.cinnamonteal.in/illustration-mouse-krita/
Posted by: markhamkinatim.blogspot.com
0 Response to "How To Draw In Krita With Mouse"
Post a Comment